
help/Tutorial/getting-started/Configure the itemconfig.yml
Configure the itemconfig.yml
Step 1 - Locate the itemconfig.yml
You can find it in /plugins/MyHungerGames/itemconfig.yml
Step 2 - Download Notepad++
This is a way better code editor than Notepad. It's recommended to download it if you have Windows.
Go to notepad-plus-plus.org and download the latest version.
Step 3 - Open the itemconfig.yml
Open the config.yml with Notepad++ if you have Windows, or use TextEdit if you have Mac.
If you are using Linux you already know how to do it.
Step 4 - Configure chest loot
When you first see the itemconfig, it's empty. Download the example below, and it will be easier to understand it.
You will see things like ==: org.bukkit.inventory.ItemStack this just tells CraftBukkit that it's an item we are talking about.
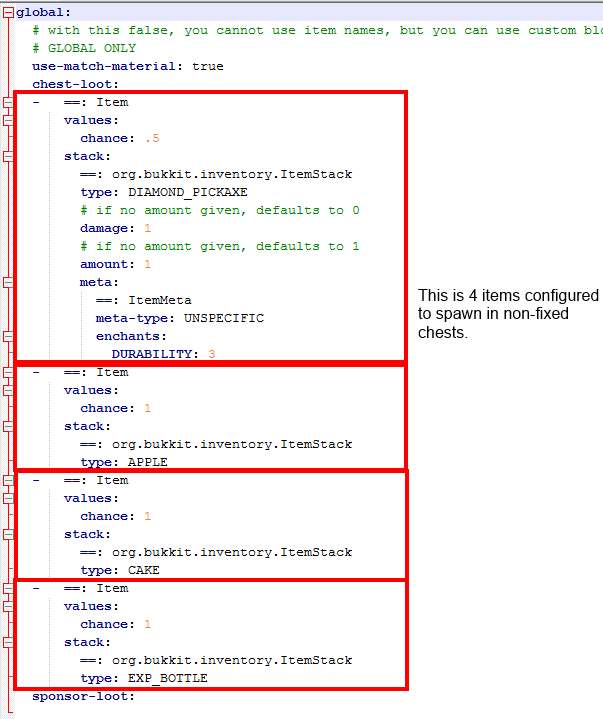
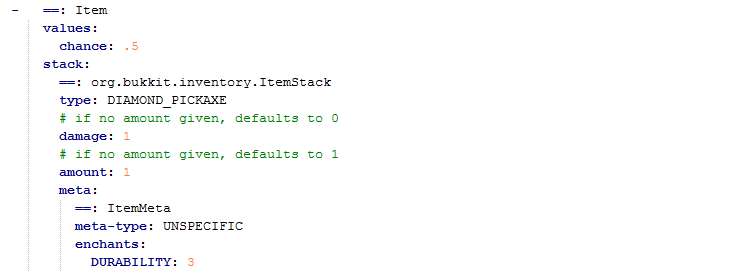
This is 1 diamond pickaxe with the enchantment durability 3, that have 50% chance of spawning.
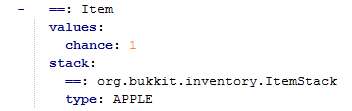
This is 1 apple that have 100% chance to spawn.
Simply just add more items, but remember to follow the correct syntax!
New and easier system is coming.
Here is the example: https://github.com/kitskub/MyHungerGames/blob/master/src/main/resources/itemconfig_example.yml
And without the hashtags: http://pastebin.com/2hZ7xcs0
Step 5 - Configure kits
So basically what you need to do to add kits is to set them up in your itemconfig.yml
This is what you should paste at the bottom of the file in order to set up this kit which I will explain.

So the first row that says
kits:
tells the plugin that this is where the kits information starts.
The second row is the name of the kit which in this case is MyKit. Make sure to end the row with an : so it's <Kits name here>:
The third row just leave it as it is, it just tell the plugin that items will be in this kit.
The fourth row you should also just leave as it is which is values:
the fifth row sets the chance of the kit to spawn.
1 = 100% 0.9 = 90% 0.8 = 80%
and so on....
so chance: 0.8 will leave an 80% chance for the kit to spawn.
The next to rows which are

You can just leave as they are.
The next row that says type: APPLE in my case tells the plugin which item is going to spawn. In my case it's an apple. You can find different items and their respective names in here:
http://jd.bukkit.org/rb/apidocs/org/bukkit/Material.html
the amount: 5 row is pretty self explanatory. It just sets the amount of items that will spawn.
Now in order to activate the kits for your arenas you will have to set up their per-world permissions
Since there are many different permissions plugins I will just go over the stuff that have to do with the MyHungerGames plugin. So let say you have a kit called "MyKit". And you have an arena in a world named Arena1World.
What you do is that you give the permission
- hunger.user.kit.MyKit
to the group in that world. Every permission plugin have a different way of doing this so go to your permission plugin and look up per-world permissions. I would recommend using PermissionsEX as a good plugin.
Step 6 - Save the itemconfig.yml
After editing the config to your needs, save it.
Step 7 - Reload the itemconfig.yml
After saving the config, type the command:
/hga reload