Help
MidiBanks is a pretty cool plugin that lets you play MIDI files in the Minecraft world using noteblocks. It's very flexible, which of course means that it's not easy to use. This should help explain how to use it.
Commands
All of the commands for MidiBanks are purely informational. None of them actually play a MIDI file.
/midi list [page]
Lists all the MIDI files available for players to use.
/midi check <filename>
(Broken)Shows information about the MIDI sequence contained in the specified file. Do not include the .mid extension in the filename.
/midi check <filename> <tracknumber>
Analyzes a track within a MIDI sequence and returns useful information about it.
/midi channels <filename>
(Broken)Lists which channels are used by all the tracks in the filename. Channels not listed will never by used when playing this MIDI.
Choosing a MIDI
Not all MIDIs can be played properly by MidiBanks. There are several reasons for this, but let's just say that it isn't possible to replicate with perfect accuracy a format that supports multiple banks of 128 instruments with 128 notes each and multiple tracks containing sequences of notes and touch-ups scheduled with microsecond precision using a mere 25 tones and 2 instruments (not including the sound effects) that don't even support long notes.
The first thing you should look for is staccato. Note blocks aren't good at long continuous notes, though you can use some of the options hacks found below to improve the way these are played.
Second, avoid MIDI files with too many (used) tracks; It is currently difficult to split tracks by bank (see the options below), and if you use a standard bank (which collapses all tracks into the same bank) you won't be able to choose the instrument for each. For track information use /midi check (see above).
Likewise, avoid MIDIs that require weird instruments, or a large variety of instruments; Stick to what Minecraft can do well (Piano or at least no more than 2 instruments if possible).
If you really want a certain MIDI and it doesn't play well on MidiBanks even using the hacks below, you may want to get an MIDI editor and tweak the file yourself to make it more compatible. Some people may want to create their own musics, or even sound effect sequences (for example, you can use MidiBanks to play a doorbell that everyone can hear!)
Basic Usage
First, put a wall sign on any block. This is the control sign. It should contain the following lines:
- Leave empty (status information can show up here)
- [[MIDI] (case insensitive)
- FILENAME (replace by filename, case sensitive)
- OPTIONS (We'll talk more about the options line further down; leave blank for now)
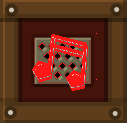
Afterwards, select a stack of note blocks and build a row of them immediately behind the wall block where you put the sign, on the opposite side. By default you will need one block for each MIDI channel, of which there are a total of 16. You can change the block below each channel to change the instrument being used.

Here you can see a standard bank with the channels labelled from 0 to f (hexadecimal notation).

To START playing the music, RIGHT-CLICK the sign. To STOP playing the music, LEFT-CLICK the sign. To PAUSE/RESUME right-click the sign while the sequence is playing.
If you want to mute one or more channels, an easy way to do it is by removing the corresponding note blocks from the bank.
Using Different Instruments
The instrument used by the note block to play a channel is determined by the type of block under the note block:
| Block Type | Instrument | |
|---|---|---|
| 1 | Wood-based blocks (including another note block) | Bass Guitar |
| 2 | Sand / Gravel / Soul Sand | Snare Drum |
| 3 | Glass / Glowstone | Clicks / Sticks |
| 4 | Stone-based blocks (e.g. ores) / Obsidian / Netherrack / Bricks | Bass Drum |
| 5 | Dirt and all other blocks including Air | Piano |
MidiBank Options
MidiBanks provides several advanced options. These options can be added to the 4th line of the sign. No spaces are required, and they can be in any order. They are case-sensitive.
S - Shifts tone mapping by 1 octave. MIDI provides 128 tones while Minecraft supports a mere 25 (2 octaves + 1 tone). To get around this problem, MidiBanks maps Minecraft's 2 octaves multiple times onto the MIDI scale, such that the tones wrap around if you go beyond the limit. By default, Minecraft note 0 is mapped onto MIDI notes 18, 42, 66, etc. If this doesn't match your tune, you can use this flag to map it instead to notes 6, 30, 54, etc.
L - Makes the MIDI bank loop, or in other words, play over and over. It will stop only when the sign is left-clicked, when the console command midi halt is used (see above) or if all noteblocks are destroyed. Usage of this flag can be restricted via configuration. If the bank is wired to redstone and Y is not set, this flag only works when the bank is powered.
A - Makes the MIDI bank start playing automatically, as soon as the chunk where it resides is loaded or immediately if it's already loaded when the plugin is enabled. If L is not used it will only play once. Usage of this flag can be restricted via configuration. If the bank is wired to redstone and Y is not set, this flag only works when the bank is powered.
=nnnn... - Where nnnn... is a list of channels between 0 and f.
This maps the channels to the note blocks in a different order. You don't have to include all 16 of them. For example, if your MIDI only uses channels 5, a and c, you can use =5ac to map them to the first three noteblocks and you don't have to build the other 13. You can also change their order, for example, =c5a. This option has no effect if C is in use.
C - Collapses all of the channels into a single note block (the one in position o). If you do this, you increase the chance of multiple notes being collapsed into one, you can't pick instruments separately for each channel or mute specific channels, but it may be useful if you need to save space.
Tnn - Where nn is a track number in hexadecimal between 00 and ff (if it's a track number below f you don't need the leading 0). This option filters out all other tracks and plays one single track from the MIDI file in this bank. You can use this to split your MIDI file into different banks and tweak the channels for each separately. You can also use this to store multiple simple songs in the same MIDI file.
D - Display the amount of played notes (so far) in the first line of the sign. This is best used with T; You can still use it in normal mode but the different tracks of the MIDI will all compete to write in the same sign MidiBanks handles all tracks separately.
Wn - Where n is an octave between 0 and 9. This option explicitly sets the mapping window for converting MIDI notes to Minecraft notes (the given octave is for Minecraft notes 0 to 11, then 12 to 24 are mapped to the next one) - For example, W1 assigns MIDI notes 18 to 41 to be played in the note blocks. When this option is in use, all the MIDI notes that aren't mapped are ignored and not played. This option invalidates S.
R - Only significant when W is defined; Maps all unmapped octaves such that they repeat the nearest mapped octave. For example, W4R will roughly map the entire left half of the MIDI keyboard to the lower pitched octave in Minecraft and the entire right half to the higher pitched one. This may make certain tunes sound better, such as two-handed piano compositions where the hands don't cross into the other side of the keyboard.
O - Overrides automatic tempo detection and uses MidiBanks' native 120bpm. Automatic tempo detection uses the same timer as fixed 120bpm, but changes the same multiplier that's affected by the options below; if the intervals between notes are too irregular or the sequence is playing too fast/slowly for your taste, this option may be for you.
>n or <n - Respectively increase or decrease the tempo by n or 1/n, where n is a number between 2 and 9. If MidiBanks could not detect your MIDI's intended tempo, it will play too fast or too slowly (or maybe you simply want to customize it a little). Using these options you can modify the tempo by making the sequencer consume a greater or smaller amount of ticks in each step. You will find that when you need these you usually want >2 or <2. Keep in mind that speeding up the tempo may cause very close note events to be collapsed together (played simultaneously), and slowing it down may cause loss of precision in the delays between notes.
}n or {n - Fine-tune the tempo by adding or removing 0.n from the multiplier where n is a number between 1 and 9; This is most useful together with >. For example, to speed up a track by 1.5, use >2{5.
X - If your MIDI had long notes, you may find that ligatures were being used to mash multiple notes together so they sounded like a single long one. Note blocks don't support this, so in Minecraft such sequences will sound like they're being played by someone with severe Parkinson's. This option attempts to alleviate the problem by stopping the sequencer from playing consecutive MIDI notes with the same pitch in the same channel. You'll find that this really improves many MIDIs! It can however remove legitimate notes, so don't use it if you don't have to. When this option is used together with C, repeated notes will be removed even if they are being played in different channels.
Y - Enables pulse mode for the redstone start/stop input pin. This makes this pin behave like pause/resume when it receives power pulses (except stopping resets the bank) and causes the bank to ignore redstone power for autoplay/loop purposes.
Using Redstone
To operate MIDI banks using redstone, all you have to do is connect redstone wires to the control sign Craftbook-style. You must use wires - connecting other redstone-enabled blocks directly will not work. Your wire does NOT have to point directly at the sign.
Depending on the relative position of the wire and the sign, it will control different functions:
- If the wire is OPPOSITE the sign or BELOW it, it controls START/STOP
- When the Y flag is not in the sign (normal mode)
- When you power it up, the bank starts playing. You can use manual control on the sign while the wire is powered up.
- When you power it down, the bank stops playing. Autoplay will not work.
- Best used with a lever or latch (or if you use a pressure plate you must stay on it).
- When the Y flag is in the sign (pulse mode)
- Send a current pulse to play if the bank is stopped.
- Send a current pulse to stop if the bank is playing (resets the bank).
- Best used with a button or pressure plate.
- When the Y flag is not in the sign (normal mode)
- If the wire is to the LEFT or RIGHT of the sign, it controls PAUSE/RESUME
- When the bank isn't playing it has no effect
- Send a current pulse to pause if the bank is playing
- Send a current pulse to resume if the bank is paused
- Best used with a button or pressure plate