
1. Configuration and Example
Configuration and Example:
INFO : Deprecated commands and FAQ.
Why my command show's up "red" in the game chat?
Your command shows red or as a "unknown command" because they need to be registered to become "white". Use the command field register: true to do that. This also allow's you to use the tab completer on that command or run it from another Plugin.
A server restart is needed for registered commands to become effective at 100%.
A note for ancient plugin versions users (probably 0) older than the 5.0.0 (Released in 2014), the command names inside commands.yml needs to be called in a numeric ascending order. 1, 2, 3 ecc.
How to configurate and examples
How to make a TEXT command type :
The TEXT command type will show, to the player who runs the command, a determined text in his gamechat.
The text who is going to be displayed is placed, in this case, under a command field called "text". Check the example to see how is done :
'command_name':
  command: /welcome
  type: TEXT
  text:
  - '&2Hello &a$player!'
  - '&6Welcome to &e$server-name &6Server!'
  - '&6Enjoy you stay!.'

Suggestion
It's recommended to put any text line in the command file.yml inside an apex or quote character. This can help you preventing parsing errors. Example :
"command_name":
 type: "TEXT"
 text:
 - "My Text"
Creating a BROADCAST_TEXT command type:
Same as the previous example with the TEXT command type, the BROADCAST_TEXT, works in the same way, but the output of it change, and the text of that command will be sent to every player connected to that server.
'broadcast_example':
  command: /brexample
  type: BROADCAST_TEXT
  text:
  - '&6Hello online players from &e$player!'
(5.3.0+) A supplemental feature for the BROADCAST_TEXT can be the command field :
broadcast_message_permission_node
Use this one if you want to send the broadcast message to only certain user. (Users with that given permission).
To do so, add the following command field under the interested BROADCAST_TEXT command type :
broadcast_message_permission_node: permission.for.see.this.message
Text Styles - Centered text.
A built-in feature inside MyCommand to be used with both the TEXT and BROADCAST_TEXT command type is the centered text.
You can automatically auto-center the text of your command by using the "text_style" command field.
Follow the example to see how:
'center_example':
  command: /centerme
  type: BROADCAST_TEXT
  text:
  - '&aThis text is going to be right at the center'
  text_style: CENTERED
Broadcast message inside a define range :
Use the command field "broadcast_radius: 100" to make a message to broadcast only to the player inside the declared range (In this case 100)
broadcast_cmd:
 ...
 broadcast_radius: 100
You can use it with BROADCAST_TEXT command type or also with the "$broadcasttext$" placeholder for runcmd.
Create Aliases / Shortcuts commands:
It's possible make "aliases" in 2 way. The first is using the "ALIAS" Type, the other one, using the more flexible and always recommended way "RUN_COMMAND" command type.
Example :
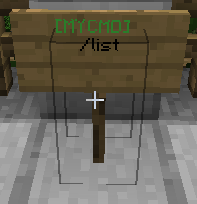
'my_alias':
 command: /l
 type: ALIAS
 alias: /list
Or :
'my_alias':
 command: /l
 type: RUN_COMMAND
 runcmd:
 - /list
As a result, those two commands, will return both with /list as output :
![]()
Using arguments in a shortcut commands:
This is possible only with RUN_COMMAND command type. Make a new command and place the $arg1 where needed, and it will be replaced with any argument typed in the game chat prompt.
For example, if you type "/vip Name1" using the command in the example below, the command will replace the "$arg1" with "Name1". In this way, the final output will be "/pex user Name1 group set Vip".
You can use multiple arg placeholders "$arg1..$arg2..3..ecc" in a command, just having attention to put those placeholder in ascending order.
Code
'vip_shortcut':
 command: /vip
 type: RUN_COMMAND
 runcmd:
 - /pex user $arg1 group set Vip
P.S: Very old image :D

--------------
--------------
Like the previous example, but with multiple $arg(s)
'define_an_region':
 command: /wgdef
 type: RUN_COMMAND
 runcmd:
 - //expand vert
 - /region define $arg1 $arg2
Another example :
'lb_rollback':
 command: /rollback
 type: RUN_COMMAND
 runcmd:
 - /lb rollback player $arg1 time $arg2
 - /ban $arg1
--------------
Make a command shortcut with $multiargs :
The $multiargs placeholder, gets all arguments typed in a command. If you don't need put "$arg1, ecc"in a specific position, use this one instead.
'your_command':
 command: /s
 type: RUN_COMMAND
 runcmd:
 - /say $multiargs
Eventually, you can put the $multiargs after some $arg's. Example:
 runcmd:
 - /myban name:$arg1 reason:$multiargs
In this way, $multiargs prints only the arguments typed after $arg1.
Require all arguments?
You can choose if your command need to type all arguments using this command field :
'your_command':
 ...
 require_all_arguments: true
Example : If your command have "$arg1..$arg2 and 3" and you type /command one two, the plugin block you the execute it, because he need all the 3 arguments, so /command one two three.
Specific number of arguments? use required_args.
Differently from "require_all_arguments", this allow you to add the "check", on every command type, and give you the ability to be more specific. The "automatic" system in runcmd, works per line, so it's not very efficent, this is a good replacment.
'your_command':
 ...
 required_args: 2
In that way, the command starts only if the player write atleast 2 arguments. Example "/command do something".
Custom error message & permissions:
You can manage the error message (invalid args) and the permission (error and node) with the "error-message:", "permission-node:" and "permission-error:" command field. Put this two parameter in the your command and customize it like in the example :
'time_shortcut':
  command: /t
  type: RUN_COMMAND
  runcmd:
  - /time $arg1 world
  error-message: '&cType /t day'
  permission-node: custom.custom
  permission-error: 'My custom message'
By default all commands use permissions.
You can manage it with permission-node and permission-error message, but it's also possibile disable it by command, using the "permission-required" command field. Put it on false, if the command must not have permissions.
So, here an example :
'no_permission_example':
  command: /freecommand
  type: TEXT
  permission-required: false
By default, if you don't set any permission, the plugin put one automatically on it.
The default permission depends on what configuration you are using.
On the newer version of the plugin, the default permission is "mycommand.cmd.command_name", where "command_name" is the first section of the command. If you see the example here above, the command name is "no_permission_example", so the final permission become: "mycommand.cmd.no_permission_example".
Otherwise, on older plugin version (<5.2.7 only), The default permission change according to the command position. Where position is equal to the ascending position of your command in the config file. Then : "mycommand.cmd.position". If you want use this method on newer plugin versions (Not Recommended), you can change the setting value in config.yml.
You can know it typing in the game or console /mycmd list or /mycmd check
N.B. If you are using "register: true", the permission-error message isn't able to replace the custom placeholder, like $player ecc. Because those are stored in the command itself, and when the error happen the event isn't even arrived to MyCommand to allow it to replace the placeholders.
Multiple command type's in one command
From the release of MyCommand 5.6.0+, you are able to put more command TYPES to one command.
To do so, instead of placing the TYPE right afer "type", put them below like a list.
command_name:
 type:
 - TEXT
 - RUN_COMMAND
Not every type works well togheter or work at all, but overall, if you want, you can. The example above, is one of the various combination you can do.
Item Cost function, how to use:
Example of use :
INFO: On newer plugin versions (>4.0.0), you must use the item name instead of the item ID. So, if in the previous plugin version "itemcost" line is '4:5', in the newer become "COBBLESTONE:5".
Example of use :
'ic_example':
  command: /itemcostexample
  type: TEXT
  text:
  - 'This command cost 5 cobblestone. ITEM_NAME:AMOUNT'
  itemcost: 'COBBLESTONE:5'
If you want, you can change the default message using success-message or error-message field. Example:
Examples :
cost_example:
  command: /costexample
  cost: 5
  success-message: "&aPaid &7%s $"
  error-message: "You need %s $ for perform this command!"
itemcost_example:
  command: /itemcostexample
  itemcost: "COBBLESTONE:5"
  success-message: "&aSpent &7%s %s &aon this command"
  error-message: "You need %s %s for run this command!"

From MyCommand 5.4.2, this feature supports multiple items at once, or also the Item custom displayed name as variable. This allows you to make more precise requests.

Example :
 itemcost: ITEM_1:AMOUNT_1;ITEM_2:AMOUNT_2

or with the DisplayedName

 itemcost: IRON_SWORD:1:SUPER IRON SWORD;GOLDEN_CHESTPLATE:1:&eULTRA ARMOR
Register Real commands and the Tab Completer
Why register a command?
Registering a command, gives you some vantages, like the ability to perform this new created commands in another plugin.
Another feature is the Tab Completer. This is available only if the command is registered.
If you want to ovverride another plugin command, don't utilize this feature.
So, how i can register a command?
You can do that, by adding the command field : "register: true" or "registered: true" inside the command you want to register.
Example :
'registered_command':
  command: /buycraft-pack1
  type: RUN_COMMAND
  runcmd:
  - "/say The player $arg1, have just buyed the Pack1 from the store!"
  register: true
Another one, this time with a customized TabCompleter
'gm_alias':
 command: /gm
 type: RUN_COMMAND
 runcmd:
 - "/gamemode $multiargs"
 register: true
 tab_completer:
 - survival
 - creative
 - adventure
In this last example above, you can see a customized Tab Completer. This feature works only if the command is registered. Going in-game with the last example, typing in the game chat "/gamemode" and then pressing the TAB key, it will return to you with the tips of the content inside the tab_completer command field, and so "survival, creative ecc".
By default, if you don't set-up a tab_completer field in a command, Pressing the TAB key, will result with the list of the connected players to that server. If you want both, check the next paragraph. (Advanced use)
Other feature for registered commands :
Setting up a custom command description with :
command_description: "My Registered Command"
Or, turn on the auto register in config.yml to make any command created with MyCommand registered by default.
COMMANDS:
  AUTO_REGISTER: false
  DEFAULT_DESCRIPTION: "Registered MyCommand Command"
Another feature linked to registered commands, is to make whole RUN_COMMAND feature, executing only real commands. This can help prevent some problem in certain cases, but take in mind that by turning on this feature, unregistered commands, can't be run from a runcmd list.
RUN_COMMANDS:
  SENT_BY_CHAT: true
Add multiple aliases to a registered command :
You can add easily multiple aliases to a registered command by placing them under the "aliases" command field. As the example below :
aliases_example:
  command: /vote
  register: true
  aliases:
  - /v
  - /voting
  - /ecc
P.S The command field "aliases" is completly different from the command type "ALIAS".
Advanced use of the TabCompleter (>5.5.1) :
tab_completer can be customized by positions following the scheme here forward.
There are special PlaceHolder for the tab_completer only : like $player_list for example - (It returns with a list of the online players)
tab_completer:
 1:
 - set
 - add
 - remove
 2:
 - $player_list
 3:
 - money
 - gold
 - credits
 4:
 - amount
 - $rnd6
In this example instead, every position of the command typed in the chat prompt, will return with different informations. ALWAYS use numbers in an ascending order 1,2,3... .
Example, if in the chat i have "/manageuser _" where "_" is the prompt position, the auto completer above the chat will show me "set , add and remove". Again, if i have "/manageuser set _", in the following case, i will have the list of the connected players in the server, because the placeholder "$player_list" does this. And so on.
To see all the available placeholders check this page
Create permission based tab_completer suggestions:
It's possible show different results by the user permissions.
Use the parameter <permission> to split the suggestion to the permission node area.
 tab_completer:
  1:
  - Show this to members<permission>myperm.member
  - Show this only to vips<permission>myperm.vips
  - Show this to everyone
How to use condition inside the tab_completer.
Example:
Use this syntax : <pos_1=give> on the second position, to show that option only if the previous selected word in position 1 is give.
tab_completer_conditions_ex:
  command: /tabcondex
  type: RUN_COMMAND
  runcmd:
  - $broadcasttext$&0[&e$player&0]&r $multiargs
  required_args: 1
  register: true
  tab_completer:
   '1':
   - give
   - msg
   - other
   '2':
   - money<pos_1=give><permission>test.test
   - $player_list<pos_1=msg>
   - something<pos_1=other>
   - always show
   '3':
   - bla bla
   - amount<pos_2=money>
tab_completer_display_mode:
by default is "CHARACTER_BASED", that means when you start typing in the word you want, the suggestions adjust to that word accordingly.
use SHOW_ALL to get everything all togheter regardless of what the user type in.
Example:
tab_completer_display_mode: SHOW_ALL
P.S.You can't register (REGISTER : TRUE ONLY) commands with spaces in the name.
command: /test example (WRONG) -> command: /testexample (CORRECT)
REGISTERED commands can't be created with multiple arguments in the command field, only non-registered ones can.
Always register only the root command. If you want to have subcommands of that one without using the scripts, leave the unregistered.
Use REGEX to filter what the user can type-in
By default from MyCommand 5.6.8+ a global regex filter is active. You can change it in config.yml
REGEX:
  USE: true
  PATTERN: "^[-a-zA-Z0-9&._ ]+"
if you want to add for example, the /, just put it as "^[-a-zA-Z0-9&._ /]+" and so on.. Check on internet for better patterns.
If you don't want to use it, put USE on false or PATTERN: ".*" and everything will pass.
Per-Command regex filter :
Customize the allowed characters a player can type into a specific command.
Add the following fields under the interested command to apply the effect.
regex_pattern : "^[0-9]+"
regex_error_message: "Only numbers are allowed"
Block commands with a Permission (also Vanilla Commands)
Use the "ADD_PERMISSION" command type to add an extra permission to the interested command.
Example you want to block the /pl command from being showed? Do it in this way:
'block_pl':
 command: /pl
 type: ADD_PERMISSION
 permission-node: blocked_commands.pl
 permission-error: '&cNope'
How to make delayed commands/pause
You can use the $delay$ prefix, only in the RUN_COMMAND command type.
To use this feature, just put $delay$ as a prefix of the command (Check the example below)
Example :
'1':
 command: /delayexample
 type: RUN_COMMAND
 runcmd:
 - $delay$/time day
 - /say oh, the light, finally!
 - $delay$/time night
 - /say just joking! It's night again!
 delaytimer: 5
Another example :
'2':
 command: /delayexample2
 type: RUN_COMMAND
 runcmd:
 - $delay$/broadcast 5..
 - $delay$/broadcast 4..
 - $delay$/broadcast 3..
 - $delay$/broadcast 2..
 - $delay$/broadcast 1..
 - /broadcast Welcome in $player Event at X-$locX Y-$locY Z-$locZ!
 - /tpall $player
 delaytimer: 1
How you can see, there is a command field called delaytimer. Use it to set how many time it needs to elaps when $delay$ it's used. The number (by default) is express in seconds.
So " delaytimer: 1" means you will have 1 second of pause.
If you need more accuracy, it's possible to change the delaytimer format from seconds to ticks.
Using delaytimer_format in the command fields, you can switch from SECONDS to TICKS
(20 server Ticks = 1 second)
Example:
  delaytimer: 20
  delaytimer_format: TICKS
TIP: You can use $delay$ alone in a row, without the needs of having a command or a function with it.
From the version 5.3.3 (or newer), you can use a custom timing on each "$delay$" prefix.
This value must be written only in " server ticks". (20 ticks = 1 second).
- Example : $delay$<60> or .... $delay$<$randomnumber%60%>
'custom_timings':
 command: /customtiming
 type: RUN_COMMAND
 runcmd:
 - "$text$The command will be executed in 3 seconds..."
 - "$delay$<60>"
 - "/command"
or....
 runcmd:
 - "$text$If you're lucky, this command will take only 10 seconds to be executed... or just wait 1 minute"
 - "$delay$<200>"
 - "$delay$<$randomnumber%1000%>"
 - "/command"
How to set Warmups and Cooldowns
Cooldown or warm-ups for custom commands (ONLY commands created with MyCommand)
cooldownhere:
  command: /command
  type: TEXT
  ...
  cooldown: 5
or :
cooldownhere:
  ...
  warmup: 5
Instead, if you need to put a cooldown or a warmup to another plugin command, see below :
1. Put "WARMUP" , "COOLDOWN" or "WARMUP_AND_COOLDOWN" in the "type" command field.
2. Write the command where you want apply the warmup or cooldown typing it in the "command" field line.
3. And set the time (in seconds) with "delaytimer" line.
See the example:
'warmup_example':
  command: /spawn
  type: WARMUP
  delaytimer: 5
Cooldown example: (If you need that, you can use also "success-message" with the cooldown type)
'cooldown_example':
  command: /warp
  type: COOLDOWN
  delaytimer: 60
  success-message: "Teleported!"
Warm-ups can be canceled on the move event. Put true on MOVE_LISTENER in the main config. (config.yml)
(It's disabled (false) by default, once changed, restart the server to make it effective)
WARMUP_AND_COOLDOWN apply both the effect to one command
Cooldowns can be stored in a yml file to not lose them when the server get restarted or stopped.
Use DEBUG.SAVE_PENDING_COOLDOWNS in the config.yml for manage this function. (true/false).
Custom Cooldown message :
cooldown-message: "wait $days$hours$minutes$seconds second more" Allows you to costumize the cooldown message
On older plugin version instead of $seconds ecc, there is only %s as placeholder.
You can edit the default one in language.yml
COOLDOWN1: "&cWait $days$hours$minutes$seconds before you can use this command again"
Remove the bypass message to players who have the permission :
show_bypass_message: false
(Old version of plugin <5.0.0,support only warmups and the command type it's called "type: addtimer" )
Economy features
To use the economy features with mycmd commands, you need an economy plugin and the Vault plugin.
The use it's simple, just change the config line "cost" in the interested command.
This example withdraw 5$ from the player sender.
'economy_ex':
 command: /takemymoney
 type: TEXT
 text:
 - "&2Thanks!"
 cost: 5
If you need to be more specific, use a decimal value, by placing the dot character. "."
Example:
cost: 5.50
To allow players to use the command, also if they don't have the required money to do that, you can by allowing the debts. Change the "allowdebit:" to "true" in the main config.yml.
Can i add the economy cost to another plugin command? Yes, create a new command and set the type to ADD_COST. Example :
'mykit_command':
 command: /kit
 type: ADD_COST
 cost: 500

#(Be aware who in this case MyCommand can't know if the output command will give a successful result. MyCommand will always withdraw moneys independently from the result)
PlayerData Economy 5.6.8 :
MyCommand can now be used as a basic Economy Plugin, using a playerdata value as storage. You need Vault to make it working.
What's the point of that? If you don't have an economy plugin, you can turn this on, and other plugin who use vault to draw money, they're automatically going to draw "money" from mycommand.
Configure it from config.yml
ECONOMY:
  USE_MYCOMMAND_AS_ECONOMY_PLUGIN: false
  PLAYERDATA_VALUE: money
  SUFFIX: "$"
Perform a command by the console from a player sender. RUN_CONSOLE
Same as RUN_COMMAND type, but all the commands, are performed from the console. This allow's you to run command even if the sender isn't in possess of the necessary permissions. Take in mind who not every command works from the console, and not every command act as the in-game counterpart.
And yes, be aware of the fact that if you put "/op $player" the player will actually get OPPED, so caution.
One example of use:
'run_by_console':
 command: /goto
 type: RUN_CONSOLE
 runcmd:
 - /tp $player $arg1
 - /money take $player 500
Using the placeholder $RUN_CONSOLE$ (5.6.0+)
The $RUN_CONSOLE$ prefix. Allow's you to run command by the console, per line, where required.
runconsoleplaceh:
 command: /rcph
 type: RUN_COMMAND
 runcmd:
 - "/runthisfromgame"
 - "$RUN_CONSOLE$/andmefromtheconsole"
Message Tooltip/Suggest Command with RAW_TEXT
You can use RAW_TEXT commands for suggest commands and hover text over a message. This command type works only on Spigot servers. (No CraftBukkit).
Create your command like an normal TEXT one, like in the example, and use the ";" char for split the Chat Text from the Hover and the Suggested Command.
rawmessage_example:
  command: /raw1
  type: RAW_TEXT
  text:
  - '&aHello &b$player! &aHover your mouse over me!; &dMAGIC'
  - '&0[&d*&0]&e Click me; &eClick Here for suggest the command &d/mycmd;/mycmd'
  - '$RUN_COMMAND$&0[&e*&0]&c Set the time to day; &eClick for Execute;/time set day'
  - '$OPEN_URL$&0[&e*&0]$random_color Open Google.com; &eClick for open;http://www.google.com'
So : MESSAGE ; HOVER MESSAGE ; SUGGESTED COMMAND.
If you want, you can create commands with only the Hover message, just removing the ;suggested part. Example :
MESSAGE ; HOVER MESSAGE.
You can change the Click Event from Suggest to $RUN_COMMAND$ or $OPEN_URL$ For do this, put this 2 string at the start of the your command, like the example above.
Change the type to BROADCAST_RAW_TEXT, for send the message to every connected player.
how i can create 2 or more different hover/click part in one line?
- You can do that, just splitting them with the < and > as separator.
- Example :
-
'&aTEXT_1 ;HOVER OF TEXT 1<and>$OPEN_URL$&bTEXT_2;HOVER OF TEXT 2;http://www.example.com'
Can i have multiple line in the hover part?
- Yes, you can split multiple lines in the hover part with < newline > as separator.
- Example :
-
'TEXT;Line 1<newline>Line2'
- Also, in the hover part, you can use this 2 placeholder to show an Item or an Entity. ($SHOW_ITEM$ and $SHOW_ENTITY$)
- Example "Hover on me:$SHOW_ITEM$STONE"
Use %skip% in the HOVER PART of a RAW_TEXT to prevent the popup to show at all.
If for any reason you need the ";" character available, you can change whatever character MyCommand has to use to split the various section of the RAW_TEXT. Go in config.yml and find:
REGEX:
  RAW_TEXT_SPLITTER: ";"
LIVE_CHAT . Make the chat a live prompt.
Basically the chat become a prompt. Until the player gives the correct answer it will asks for it. If correct it will launch a command.
(Note: runcmd here is working only as a list, it hasn't the features of a RUN_COMMAND.) Use it in conjunction of execute_mode to be able to concatenate more commands and more questions.
If you want to use this feature, you need to enable the "CHAT_LISTENER: true" in the main config.yml. Done that, restart the server.
live_chat_example:
 command: /livechat
 type: LIVE_CHAT
 text:
 - "&aHow much is '2 + 2'"
 - "&aWrite your answer in the chat!"
 answer: "4"
 success-message: "&bQuick math!"
 runcmd:
 - "/me minus 1 that's 3!"
Optional LIVE_CHAT features:
- answer can be "*", in this way can accept any value (if you just want to use it as a prompt.
live_chat_answer:
 command: /clanname
 type: LIVE_CHAT
 text:
 - "&aType your clan name in the chat!'"
 answer: *
- escape-parameter: "quit" , to add one more word to quit/escape from the LIVE_CHAT.
live_chat_2:
 escape-parameter: quit
- exit-message: "You've left the prompt" Costumize the message when leaving.
- incorrect-answer: "&cIncorrect answer. Type &4close &cto quit this prompt"
Launch randomly a command choosen from a list
Use command type : RUNCOMMAND_RANDOM or RUN_CONSOLE_RANDOM to run a randomly choosen command from the runcmd list.
command_name:
 command: /cmd_name
 type: RUN_CONSOLE_RANDOM
 runcmd:
  - /prize 1
  - /prize 2
  - /prize 3
Launch a command as operator
This command type give a temporary OP status to a sender player for executing a command
(USE AT YOUR OWN RISK)
'give_stones:
 command: /stonepls
 type: RUN_AS_OPERATOR
 runcmd:
 - /give $player 1 64
All the times MyCommand give the op status to a player, a log in the console is written. For extra security, an extra task get launched every time, for remove the OP status after some seconds (just in case, if you made mistake with the command and give him permanent op status).
Setup MYCMD Button, Pressure Plate, Lever, Door , Detector Rail or your Customs
Type /mycmd-blockset in game chat to see the help menu.
1. Place your button, pressure plate or any block you have enabled in the config.yml
2. Look at the target block you want use and type /mycmd-blockset create
3. If created with success, you can now add commands with /mycmd-blockset add <command></command>
4. That's it. test if it works by interacting with it.
Other commands:
- Show block info with: /mycmd-blockset check
- Remove all commands from a block : /mycmd-blockset delete
- Remove a single command from a block : /mycmd-blockset remove
- Switch type from Player/Console : /mycmd-blockset switch
From MyCommand 3.9.0 and above, you can manage the block name id. Check in the config.yml.
You can manage what blocks can be used from the players with the command:
/mycmd-blockset manageblocks <add|remove> <left|right|physical>
How to disable a command only on certain input.
disable_on and disable_on_length
disable_on :
This feature allow's you to disable the command if the typed-in command match the one inside the "disable_on" list
pets:
 command: /pet
 type: RUN_COMMAND
 runcmd:
 - '/shop pets'
 disable_on:
 - /pet summon creeper
In the example here above, if the player type-in /pet, the original pet command will get replaced as "/shop pet".
Now, assume we need to disable this command to not run "shop pet" in determinate circumstance, you can do that with disable_on. In this way, if the player type in "pet summon creeper", the original command get executed.
disable_on_length:
With disable_on_length: 1 for example,
Having as example the /ignore command, if the user type only "/ignore", MyCommand will execute the command created with MyCommand.
If the user type "/ignore <anything>", MyCommand will not get triggered, and the original command will run.
With both the function, you need to use them in unregistered mode. So register: false;
How to use allowed_worlds
You can use the "error-message" line for put an custom error.
'onlyinthenether':
  command: /onlynether
  type: TEXT
  text:
  - "&cYea,The Nether!"
  allowed_worlds:
  - world_nether
  error-message: "This command is not accessible from this world"
Repeat multiple times text or commands.
Put '%Repeat%n% before the command/text.
clearchat:
  command: /mycmd-clearchat
  type: BROADCAST-TEXT
  text:
  - '%Repeat%30% '
or
  runcmd:
  - '%Repeat%30%/dosomething'
How to use "$world=%world_name%" in RUN_COMMAND Type
'per_world_commands':
  command: /perworldcommand
  type: RUN_COMMAND
  runcmd:
  - "$world=%world%/me This command will be performed only if you are in the world"
  - "$world=%world_nether%/me And this only if you are in the nether"
  permission-required: false
How to use "execute_mode" command field.
If you want made an command performable only from several source,you can use this function.
There are multiple types, here listed :
NORMAL
BLOCK_ONLY
FROM_ANOTHER_COMMAND
NPC_ONLY
CONSOLE_ONLY
EVENT_ONLY
HOLOGRAMS_ONLY
ITEMFRAME_ONLY
'only_from_block':
  command: /onlyblock
  execute_mode: BLOCK_ONLY
  type: TEXT
  text:
  - "This command can be called only from /mycmd-blockset"
'only_from_command':
  command: /onlybycommand
  execute_mode: FROM_ANOTHER_COMMAND
  type: TEXT
  text:
  - "This command can be called only from another mycmd command"
Possible CONSOLE_ONLY Example :
Creating an reward command for all players, triggered by BuyCraft. The eco command need to be executed from the console (permission reason).
console_executefor_test:
  command: /extest1
  executefor: ONLINE_PLAYERS
  type: RUN_CONSOLE
  runcmd:
  - /eco give $player 5000
  permission-required: false
  execute_mode: CONSOLE_ONLY
  register: true
Exempt players from the execute_mode block:
You can use custom permissions to allow players to run a specific command execute_mode command :
execute_mode_bypass_node: permission.to.bypass
How to use "executefor" command field.
Supported types :
SENDER (Execute the command only for the sender)
ONLINE_PLAYERS (Execute the command for every player online)
WORLD_PLAYERS (Execute the command for every player in the same world of the sender)
'executefortest':
  command: /executeforall
  type: RUN_CONSOLE
  executefor: ONLINE_PLAYERS
  runcmd
  - "/tp $player 0 64 0"
  permission-required: false
Basically works with every command type, except ADD_PERMISSION
(By Default every commands it's on SENDER type) (maybe, some of this options can made some loops if used wrongly.)
Custom Logger $log$ (file.log) 5.6.0+
It's now possible save logs text in separate log file. Just use log_filename: "filename.log" like the exampel here below, and the $log$ message will get saved in "/plugin/MyCommand/logs/filename.log"
my_custom_logger:
 command: /mylog
 type: RUN_COMMAND
 runcmd:
  - "$text$&aThis log file is getting saved in &2/MyCommand/logs/filename.log"
  - "$log$[$player] $multiargs"
 log_filename: filename.log
In-Game Items (Itemset)
How to Use : (>5.1.4+)
- First of all, active the item event with "/mycmd-itemset on".
- So, get an item in your hand and type "/mycmd-itemset add" for add it to active item(s) list.
- Now if you click left or right mouse button it's possible read in chat about the item without command in it.(If you don't want this message put "empty_message" field in itemset.yml on false.
- Now for add something on the activated item, type, for example, "/mycmd-itemset right /list". In this case if you use the right click of the mouse, the server runs the command "/list" for the player who send this action.
- Same thing with "/mycmd-itemset left /your command", but in this case the command will be performed only if you use the left button of the mouse.
- You can add multiple commands in one line using the ";" char between each command. Example : /command1;/command2
- And that's all for made it working.
- Now if you need to run this command only on a specific item with a specific name, you can set an name on the your item with the command "mycmd-itemset name NewName".
- For more command(s) type "/mycmd-itemset" in-game
How to Use : (Old<5.1.4+)
First of all, active the item event with "/mycmd-itemset on".
So, type /mycmd-itemset without arguments on the interested item.

Now type the command(s) to run(s) on the current item with:
/mycmd-itemset /yourcmd
If you want to execute more commands in one use the ";" char for separate the commands,Example:
/mycmd-itemset //expand 10 up;//expand 10 down
You can also use arguments in commands, like:
- $targetentity (OLD VERSION <5.0 is : $targetplayer) (get the name of player right clicked)
Possible use : /mycmd-itemset /jail $targetentity
If you want, it's possible save and load when you want a saved set. Also when the plugin starts. See itemset.yml.
Make a MYCMD Sign
On Sign you can :
- Execute the command by right-clicking on sign.
- Show the messages you put on the sign on game chat.
- How to Use :
Put [MYCMD] in first line of sign
In Line 2,3,4 insert your /command or text
Final Result :
- How to Use :
You can change the sign header from config file : (default) signheader: [MYCMD]
From the 5.0.0 version, you can create lists of commands with the /mycmd-signset command ! Create a new list,put the command in it,and when you create an sign,put the name of the created list on the 2°,3° or 4° line of the sign.
Holographic Text
This feature will spawn a floating text in front of the player sender.
Command type : HOLOGRAPHIC_TEXT and BROADCAST_HOLOGRAPHIC_TEXT . Use the second one to show the text to every connected player.
holographic_example:
 command: /holoexample
 type: HOLOGRAPHIC_TEXT
 text:
 - "&eHello $player, how are you?"
 - "$random_coloryeah, i'm fineeeee thanks!"
 - "&dCurrent time &5$time"
 delaytimer: 3
delaytimer, adjust the time the hologram will stay up.
With Mycommand 5.6.4 there is a new command "/mycmd hologram" that's allows you to spawn permanent holograms in the server and save them in a database, and even run command through them.
IconMenu Commands
MOVED, Check the navbar ->
Scoreboard Commands
INFO: Older version of the plugin (<5.3.3), Uses a different character for split the "amount" part from the "text". This means, on MyCommand 5.3.3 and newer, the correct code is "$health;Health level:"
Instead, on older version (<5.3.3), the correct code is "$health:Health level". What changed? The split char in the new version is ";" and not ":".
- The Scoreboard will get removed after DelayTimer(sec). If 0 don't remove
- Use $marquee$ as a prefix of the scoreboard name for scroll the text.
- Use scoreboard_refresh_ticks, for determinate how frequent the plugin have to update the scoreboard.
Examples :
Dynamic scoreboard :
scoreboard_example:
  command: /sbexample
  type: SCOREBOARD
  scoreboard_name: "$marquee$&1M&2y&3C&4o&5m&6m&7a&8n&9d &aS&bc&co&dr&ee&fb&0o&1a&2r&3d &nExample&r "
  scoreboard_text:
  - "4;&c&lCoordinates:"
  - "3;&6X:&e $locX &6Y:&e $locY &6Z:&e $locZ "
  - "2;&c&lPlayer Info:"
  - "1;&6Health: &e$health"
  - "0;&6Food: &e$food"
  scoreboard_refresh_ticks: 5
  delaytimer: 10
Static scoreboard:
For a static scoreboard just don't use "scoreboard_refresh_ticks".
'1':
  command: /sbtest
  type: scoreboard
  text:
  - 'Remove scoreboard after DelayTimer(sec) - 0 = never'
  scoreboard_name: '&bTest'
  scoreboard_text:
  - '$randomnumber%1000%;Lucky'
  - '$exp;Exp'
  - '$level;Level'
  - '123;Text with max 40 chars'
  cost: 0
  delaytimer: 5
INFO: you can use the $marquee$ prefix without using scoreboard_refresh_ticks.
Other function :
scoreboard_rendertype: HEARTS
or
scoreboard_rendertype: INTEGER (by default is this one)
Http Get Request (CALL_URL)
Use this function for send a GET request to a web page.
Basically this function can help you retriving datas from a php script or similar.
Command Example :
'call_url':
  command: /call-url
  type: CALL_URL
  url: http://localhost/yourscript.php?user=$player
  get_output : true
  show_output_ingame : true
  save_output_as : httpResponse
Fields :
- url : Put your url here, you can use placeholders aswell, like $player, $arg1,2, ecc
Utilities :
You can split the lines to show in-game with "< newline >" directly into the html\php code page. Example:
<?php echo "Line 1 <newline>&aLine 2"; ?>
(Optionals) :
- get_output : <true/false> #Get the page output atall (Default false) If you need just to trigger the script, setting this to false is enough.
- show_output_ingame : <true/false> #Show the output in the game chat (Default false) Be carefully at sending only what you need, or your client may crash.
- save_output_as : #Save the output in playerdata.yml (To use it later in another command) (Default empty = save nothing)
- user_agent: Mozilla/5.0 #Change the User Agent
"POST" request method.
use "http_request_method: POST" as a command field, for set it up. (By default http_request_method is "GET")
and "post_parameters: user=$player&password=12345" for send data.
Retrieve a JSON STRING VALUE from the page :
Using the field:
get_json_string: variable_name
The output of the requested page will be the value of that specific json string.
Run a command automatically after a Page request :
Use:
get_run_command: /command $output
As you can see, you can also use $output as placeholder to use the obtain data from the php script, directly into another command, that can be a script who checks the output to do something else.
Executing BungeeCord Proxy commands (5.6.0+)
Preparation :
1. Place the MyCommand_BungeeCord.jar file inside the BungeeCord plugin folder
2. Open the config file of the Main MyCommand (config.yml) and put PLUGIN_MESSAGE_LISTENER on true
3. Done. Restart proxy and server.
How to use in MyCommand Spigot side.
Use those placeholder at the start of a runcmd line to execute commands on the BungeeCord Proxy. Or use /mycmd bungee (to debug stuffs).
bungeecord_bridge_example:
  command: /bcb_execute
  type: RUN_COMMAND
  runcmd:
  - "$bungeecord_execute$command_to_execute_on_the_proxy"

  runcmd:
  - "$bungeecord_runasproxy$command_to_execute" #It run's the command's as the proxy and not the player. This is like RUN_CONSOLE, it will bypass any permission.

  runcmd:
  - "$bungeecord_chat$Chat as a player or execute /server commands NOT PROXY one's"

  runcmd:
  - "$bungeecord_message$PRIVATE MESSAGE to the sender"

  runcmd:
  - "$bungeecord_broadcast_message$BROADCAST MESSAGE on whole PROXY"
BungeeCord Teleport
If you have a server with BungeeCord Proxy, use this function for make teleports command from one server to another.
- Command type : BUNGEE_TP
Variables :
- server_name: Put your server name here (You can find the name in the bungee config, or type /glist)
Command Example :
bungeecord_example:
  command: /hub
  type: BUNGEE_TP
  server_name: hub
Use /lmcmd Commands
(This command it's deprecated,but it's here if you want use it)
REMOVED FROM THE VERSION 5.6.4. I've made a standalone version, check on the MyCommand spigot page.
1. Create a new list of commands by typing : /lmcmd create
2. Add the commands in your new empty list with : /lmcmd add (with slash if you want to use this in-game)
3. Perform the list of commands with : /lmcmd run
Other commands: - Show all command list with : /lmcmd list
- Remove a list of command with : /lmcmd delete
- See information of a list with : /lmcmd check
- Remove a single command from a list with : /lmcmd remove
Type & PlaceHolders
Page Moved, check the NAVBAR on the right ->
Playerdata feature and MYSQL support
Like the custom variables feature, but here the information can be stored for every specific player.
Try "/mycmd-playerdata" in-game to see all the commands available in-game. And check the Script page for some examples and useful scripts.
- /mycmd-playerdata check PlayerName (Returns with all the stored variables for that specific user)
- /mycmd-playerdata set PlayerName coins 10 (This will create or override that variable with the new value.)
- /mycmd-playerdata PlayerName coins 10 (Works with numbers obviously to add or subtract, 10 in this case)
- /mycmd-playerdata removevariable PlayerName varname (Delete a variable from the database)
- /mycmd-playerdata deleteaccount PlayerName (Delete everything from a player)
remove the output in the console :
You can disable the output of the "edit" done, by adding _silent suffix to the operation you're doing.
Example /mycmd-playerdata add_silent PlayerName coins 1 , or remove_silent ecc...
MYSQL SUPPORT
To utilize a SQL database for MyCommand PlayerData feature, you need to set-up a connection. For do so, you need to update the lines in config.yml with your database information. Put USE: true, and a working database name and server location.
MYSQL:
 USE: false
 HOST: 'localhost'
 PORT: '3306'
 USERNAME: 'username'
 PASSWORD: 'password'
 DATABASE: 'MyCommand'
If you're having problem with the reconnetion to the mysql database, try to use
MYSQL:
 AUTO_RECONNECT: true
Or add "?autoReconnect=true" just after the database name. Example :
DATABASE: 'mycommand?autoReconnect=true'
For both, variables and playerdata you can store them also creating a section in the config file. Just split the variabile with an dot ".". Example : /mycmd-playerdata set Ivanpro home.loc_x 10
home:
 loc_x: 10

Can i change the NoData return result if a variable is empty or doesn't exist?

Using PLAYERDATA_ERROR_MESSAGE language string in language.yml you can. But be aware who that it is used in some crucial check, so don't use strange characters here.


Upgrade from 5.6.6 yml file to Individual yml file in newer version with the command /mycmd-playerdata convert_to_new_flat_style


For those who want to migrate from a FlatFile to a MySQL based one, it's possible converting them from a 5.6.6+ FF DB type to MySQL by running the appropriate command :

"/mycmd-playerdata convert_flatfile_to_mysql"
Leaderboard command type for playerdata
Sort playerdata number values by the highest amount. Configure it using the new field "playerdata_value" , "leaderboard_size" and "leaderboard_text"
PlaceHolders : $index , $username , $points
leaderboard_coins:
 command: /topcoins
 type:
 - TEXT
 - LEADERBOARD
 text:
 - "&dCoins Leaderboard :"
 playerdata_value: coins
 leaderboard_size: 20
 leaderboard_text: "&a$index: &b$username &a- &b$points"
WorldGuard Region support
Add allowed_wg_regions or blocked_wg_regions in you command fields for allow o block single or multiple regions.
allowed_wg_regions:
 - test2
 - test3
Or :
blocked_wg_regions:
 - test4

If you need to be more specific, there are 2 placeholder to check if the player to check is owner or member of the zone he's currently in.  $wgisowner and $wgismember . Use them in conjunction of if/else script to determinate what to do (they return true or false).
BarAPI / BOSS BAR Features
This functions works without external plugin on MyCommand 5.1.8 or above. If you have an older version, you need to download BarAPI. BarAPI plugin. Download and put it in your plugin folder (ONLY for older version of MyCommand.
There are 2 command types. BAR_API_TEXT and BAR_API_BROADCAST_TEXT. Use the first for send the message only at the sender or use the broadcast type for display the message to everyone.
Example of use :
You can use "bar_seconds" or "bar_percentage" for manage the boss bar on older version of Mycommand
and with the newer you can also use : bar_color, bar_style, bar_flag.
+ BossBar supported colors : BLUE,RED,GREEN,PINK,PURPLE,WHITE,YELLOW
+ BossBar Style : SEGMENTED_6,SEGMENTED_10,SEGMENTED_12,SEGMENTED_20
+ BossBar Flag : PLAY_BOSS_MUSIC, DARKEN_SKY, CREATE_FOG
bar_text:
  command: /bar_example
  type: BAR_API_TEXT
  text:
  - '&aHello $player'
  bar_seconds: 5
  bar_percentage: 8
  bar_style: SEGMENTED_20
  bar_flag: DARKEN_SKY
  bar_color: PINK
or
'bar_btext':
  command: /bar2
  type: BAR_API_BROADCAST_TEXT
  text:
  - "Hello everyone!"
  - "%remove%"
  bar_percentage: 9
If you put the bar_second on 0, the bar never go away.Use %remove% for remove it, in a separate command, or replace it with another new bar.
Default time without declare nothing is 3 second, after this time the bar go away.
Setup the Scheduler
(The scheduler is not supported and maybe outdated). First : Active the scheduler from config file with :
SCHEDULER:
  ENABLED: true
Now,you can setup your date format (optional):
DATE_FORMAT: d M yyyy
d = day , M = month , y = year. For example d M yyyy = 1 12 2012.
Setup the initial timer for the first check in seconds :
FIRST_CHECK_AFTER_SEC: 60
For the last,set the scheduler timer in minutes:
LAUNCH_CHECK_ON_EVERY_N_MIN: 60
Config it's ready,now use the /mycmd-scheduler in game.
Create a new scheduler list with /mycmd-scheduler create test
Add a date,or "always" for setup the date,example : /mycmd-scheduler add test date 5 12 2012 (5 december 2012)
Now setup the commands with /mycmd-scheduler add test command /pex user User group set Member
Done.
See the other command in the commands page.
P.S.:The Scheduler doesn't work with custom commands, so register the command before or use it for other plugin commands.
Spout Plugin Features
(Requires) Spout Plugin Feature
Make a notification "spout-notification" type commands:
'1':
 command: /testspout
  type: spout-notification
  text:
  - '&4Header'
  - '&6Hello &a$player!'
  - 322
In the last line put the Item by ID (integer).Ex: 1 = stone.
Output :

Make a "spout-text" type commands:
Example :
'1':
 command: /testspout
 type: spout-text
 text:
 - §a[MyCommand spout-text output!]
 - §2Simple
 - ecc..
NPCs features
Before to start using this function, you have to enable the NPC's listener in the config.yml.
- For create a new NPC, just look where you want spawn the new one, and type /mycmd-npcs create
- An number (ID) of the new NPC will be showed in the chat. Take note and use it in the next command(s).
Every command require the ID for edit the NPC.
- An number (ID) of the new NPC will be showed in the chat. Take note and use it in the next command(s).
- For example, if you want add an command to the your new NPC, you have to type /mycmd-npcs add 1 (where 1 is the ID of the your NPC)
- Instead, use /mycmd-npcs remove 1 or /mycmd-npcs remove 1 clearall , for remove one or all the command sfrom one NPC.
- If you lose the id of one NPC, you can find him in the command /mycmd-npcs entities. An full list of created entities will be showed. For make it faster, you can use the command /mycmd-npcs tpto for teleport to the desidered NPC.
- For fully remove, so delete an NPC, there is the command /mycmd-npcs delete
- There is more command and function you can use, like AI (on-off), Glowing effect(on-off), Collidable(yes-no), Type of the NPC, Position and the Name of the NPC. Find all this command in the "/mycmd-npcs" help page.
Commands added in 5.7.0 :
- /mycmd-npcs silent <id> <on|off> (Turn off the villager sounds)
- /mycmd-npcs age <id> <adult|baby> (Set the age of a villager)
- /mycmd-npcs equipment <id> <hand> <material_name> (Set an item in their hands)
- /mycmd-npcs temptp <id> <world> <x> <y> <z> or /mycmd-npcs temptp <id> <world> <x> <y> <z> <yaw> <pitch>
Send a Title (to Player or Broadcast)
This command type is able to send a Title message.

title_test:
  command: /title_test
  type: TITLE
  text:
  - '&aHello &e$player'
  - 'Sub-Title'
Change the type to BROADCAST_TITLE to send the title to all the online players
How to use custom fadein, fadeout and stay time variables. Put the time in (seconds)
title_test:
 command: /title_test
 type: BROADCAST_TITLE
 text:
 - "&aHello i'm &e$player"
 - "and i'm talking to you"
 title:
  fadein: 3
  stay: 10
  fadeout: 2
  effect_type: 0


More fancy stuff, there is a dynamic way to show the title, activated by using
title:
 effect_type: 1
The effect 1 will print the message letter by letter.
dynamic_title_example:
 command: /dyntitle
 type: TITLE
 text:
 - "&aHello &e$player"
 - "This will be printed one letter at the time."
 title:
  effect_type: 1
Create a Task with RUN_COMMAND_TASK
If you need to execute one command multiple times in "loop" you can use this function.
Create a command as always you do, with the RUN_COMMAND type, changing the type to RUN_COMMAND_TASK.
Then edit the parameters you need to manage better the "task" :
task_run_immediately: true
If true, the command will be performed instantly. Instead, if false, the first execution of the command is after "task_repeat_every_sec" seconds.
task_repeat_every_sec: 5
Determinate the seconds between one task and the next one.
task_run_n_times: 10
Determinate how many times this task have to get executed.
Put task_run_n_times: -1 for make it unlimited.
task_run_when_offline: true
If true, when the player who performed this command go offline, the command(s) in the list continue to get executed also without the player in the server.
task_show_debug: true
If true, print the message in console, every time MyCommand start a new task
Command example :
taskexample:
  command: /taskexample
  type: RUN_COMMAND_TASK
  runcmd:
  - /do something
  task_run_immediately: true
  task_repeat_every_sec: 5
  task_run_n_times: 10
  task_run_when_offline: true
  task_show_debug: true
Use the command /mycmd tasks , to see all the active tasks.
If you need to stop some tasks for one player, use the command /mycmd tasks cancelfor
if you need something more, with RUN_COMMAND_TASK there is an while "$Script$%while%" statment you can use. Check the script page for an example.
Send an ACTION_BAR message.
Works only on Spigot servers
- put your text in "text" lines. Use $delay$ between every text line for send more messages.
action_bar_example:
  command: /actionbar
  type: ACTION_BAR
  text:
  - "§aHello §b$player!"
  - "$delay$How are you?"
  - "$delay$&aBla bla bla"
  delaytimer: 3
Change the type to BROADCAST_ACTION_BAR, for send the message to every connected player.
- (for now the fade-out it's not configurable. I can't implement it with the current api's (without using nms)).
BLOCK_PATTERN command type
Basically every letter correspond to a block.
Use <up> or <down> to change the Y level.
The command will start putting blocks at the player targetting block.
Example :
This this will create a somesort of a little house.
pattern_material contains the material block to be used. In this example X = OAK_PLANKS ecc.
Any not recognized letter is translated in AIR. In this example i used the O for the AIR cause it's much cleaner.
blockbuild2019yeah:
command: /pattern
type: BLOCK_PATTERN
pattern_material:
- X:OAK_PLANKS
- G:GLASS
- C:COBBLESTONE
pattern:
- CXXXXXXC
- XOOOOOOX
- XOOOOOOX
- CXXOOXXC
- <up>
- CXGXXGXC
- XOOOOOOX
- XOOOOOOX
- CXXOOXXC
- <up>
- CXGXXGXC
- XOOOOOOX
- XOOOOOOX
- CXXGGXXC
- <up>
- CCCCCCCC
- COOOOOOC
- COOOOOOC
- CCCCCCCC
- <up>
- OOOOOOOO
- OXXXXXXO
- OXXXXXXO
- OOOOOOOO
Undo feature:
For admins just use /mycmd undo , for players create a new command and use %PlayerOptions%undoPattern to trigger the undo effect.
mycmd-undo:
 command: /mycmd-undo
 type: RUN_COMMAND
 runcmd:
 - "%PlayerOptions%undoPattern"
ExpBar features
You can create cooldown bar effect, on the exp bar, with this feature.
There is 2 way for do that. The first creating an simple command , with the command type EXP_BAR :
exp_bar_example:
  command: /expbar
  type: EXP_BAR
  delaytimer: 10
The second way, is using this placeholder "$ExpBar%10%" in the runcmd fields.
your_command:
  command: /123
  type: RUN_COMMAND
  runcmd:
  - "$ExpBar%10%"
  - "$delay$<200>"
  - "/do something"
The OVERLAY command field
This function allow you to execute "commands" or just show text, using mycommand as an overlay.
Example, you have another plugin command, like "/gamemode", but, you want add something more to this command, like an TEXT explanation, you can do this using the "overlay" command field.
For activate this function, just put "overlay" on "true", see the example :
gamemode_overlay:
  command: /gamemode
  type: TEXT
  text:
  - "This message get showed in chat before the execution of /gamemode."
  - "Write your information here, bla bla bla..."
  overlay: true
Of course, you can use any of the MyCommand type. RUN_COMMAND, SCOREBOARD ecc.
Run a command in a specific event.
Enabling the EXTRA_LISTENER in the config.yml, you can run commands in some specific events.
Avalaible events :
PlayerJoin
PlayerQuit
PlayerKick
PlayerRespawn
PlayerDeath
PlayerInteractEvent
PlayerChangedWorld
You can manage this events, by editing the file playerevents.yml.
Example of use :
When a player join the server:
PlayerJoin:
  active: true
  execute:
  - '$text$&aWelcome back &b$player !'
  - '$text$&6Online players : $online'
In this case, when a player join in the server, will be notified with this 2 messages.
For conveinence, you can even set the message the server send when a player join the server, to do so :
PlayerJoin:
  active: true
  setJoinMessage: "$player joined the server."
same with the Quit event (When a player Leave the server or disconnect in general):
PlayerQuit:
  active: true
  setQuitMessage: "$player leaved."
Another example with the PlayerDeath event:
PlayerDeath:
  active_on_kill: true
  active_on_death: true
  ignore_env_or_mobs_deathcause: false #Prevent the player from execute command when get killed from enviroment or mobs
  prevent_suicide: true #Prevent the player from execute command by killing themselfs.
  execute_for_killer:
  - '/givepoints'
  execute_for_defeated:
  - '/removepoints'
You can execute commands when a player die or kill someone.
- Killer = Player who kill the victim.
- Defeated= Player who get killed from the killer.
For not allow players to not use the command (like in the example) "/givepoint", you can block that with the "execute_mode: EVENT_ONLY" line.
Example:
give_points:
  command: /givepoints
  type: RUN_COMMAND
  runcmd:
  - "$text$&aGood job! You earned one point."
  - "$Script$%PlayerData%points+1"
  - "$text$&aPoints balance : $PlayerData%points%"
  execute_mode: EVENT_ONLY
This feature support some special placeholder, and you can pass this variables via $args :
This variables are : $killer $killed_player and $death_cause
#MyCommand/playerevents.yml
PlayerDeath:
  active_on_kill: true
  prevent_suicide: true
  execute_for_killer:
  - '$broadcasttext$ $killer killed $killed_player!'
  - '/commandname $killed_player'

#MyCommand/commands/file.yml
command_name:
  command: /commandname
  type: RUN_COMMAND
  runcmd:
  - "$Script$%if%$arg1==AdminName"
  - "$text$ You killed an Admin!"
  - "/givesomething"
  execute_mode: EVENT_ONLY
PlayerInteractEvent:
 active: true
 cancel_event: true
 materials:
 CHEST:
 - $broadcasttext$&a$player &2touched a chest!
 COBBLESTONE:
 - /say yeah
And this last one, will trigger on every player interaction.
cancel_event on false will allow players to execute the command and still open the chest or whatever interaction they are doing on the target block.
$RUN_CONSOLE$ using this as a prefix of a command, that command will be run from the console.
$PERFORM_COMMAND$ .Placing it before the command you need to run (like in quit or kick event) to perform only a registered command. (This function is for compatibility with VentureChat and similar)
Create command with custom prefix (not only the slash)
Using MyCommand 5.3.3 or newer, you can able to turn on this feature. Go in the config.yml and active the CHAT_LISTENER. (CHAT_LISTENER: true)
Once you have done this, restart the plugin (/reload or server restart).
Now, you can create command who don't start necessarily with the slash prefix (/).
Example :
customprefix_example:
  command: !example
  type: TEXT
  text:
  - "Command Text"
- INFOS:
- Command without the "/", works only in the game chat, and can't be registered (register: true)
- You can use every char as a prefix : "command: !dice" "command: command" "command: $hello" ecc...
Custom MyCommand Locations and TELEPORT command type
MyCommand offer you a simple built-in way to create "warp" point. By using the command "/mycmd locations"
you can easily create and delete location points.
Those location points can be used as Admin utility or you can create specific commands of TELEPORT type.
The TELEPORT command type.
Teleport command type is a easier way to create tp commands, without using %PlayerOptions%teleport.
Use "/mycmd location create <name>"
And the put the <name> of the location inside the field : location_name : name
teleporttest:
  type: TELEPORT
  location_name: spawn
  command: /tptospawn
Custom MyCommand Regions
Create simple cuboid regions to be used in a command to check if a player is into it. (Like WG, but without WG).
Use the following command to start creating mycmd regions:
- /mycmd region
Once, done put the newly created region name, inside the command where you want to use that feature:
allowed_mycmd_regions:
 - region1
 - region2
Or use the Placeholder $mycmdregionname to retrieve the name of the mycmd region the player is in.
Custom images to be used inside itemframes
Apply custom images to maps and eventually use them in the itemframes.
Images need to be located in /MyCommand/images/ folder and must be a 128x128.png files. (only .png type is supported)
Use the following command to start :
- /mycmd mapimage (Permission : mycommand.mapimage)
How to use Scripts, "PlayerData", "PlayerOptions" and other related feature in a RUN_COMMAND Type.
This allow you to use %if%, %else% condition, manage playerdatas and other things.
Video tutorials :
- (English) by Koz4Christ. (MyCommand 5.1.8)
- Portuguese (by AbsintoJ) (Plugin v3.9.3)
Other Voice :
PlaceHolderAPI support, is on automatically if the plugin is present. If you want to retrieve data from MyCommand (playerdata feature) inside another plugin, you can use a specific PAPI placeholder to do so. Check the Command Type's page listed on the side.