Setup


Step 1 - Installing:
First, download the latest version from the files page, and the latest WorldEdit. Drop the Spleef.jar and WorldEdit.jar into your plugins folder. Restart your server and the default config will be generated. Open the config file by going to /plugins/Spleef/config.yml and change the settings to how you want them (Note: Not all settings actually do anything yet). Once you have the settings like you want save it, then restart your server.
Step 2 - Creating The Arena(s):
Now that you have installed the plugin, you can start creating arenas. to create an arena do /spleef createarena You do not need to select the arena are with worldedit when setting it. You can now set your tp points for when a player joins, wins and loses a game. to do this, simply go to were you want to set these points and do the commands:
/spleef setspawn <Arena#> - Sets Arena Join point
/spleef setwin <Arena#> - Sets Arena Win tp point
/spleef setlose <Arena#> - Sets Arena Lose tp point
Now you can set your floor. To set your floor, use worldedit to select the area around your spleef floor. Once selected, perform the command /spleef addfloor <Arena#> You can do this for as many floors as you want! IF IT GIVES AN ERROR, SET YOUR WARP POINTS FIRST!
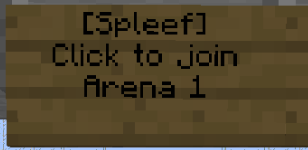
Now you can go around placing signs that look like the one below:
Your Done setting the Arena! You can now play!
-
Floor backup - Save to/load from disk
To save the floor to disk, type /spleef save <Arena#>. To load from the disk, type /spleef load <arena#>