MassRelay
MassRelay
If anyone is running this plugin on their server and wants free advertising, I would be more than happy to list your server at the bottom of the page.
Description
This server mod adds mass relays from Mass Effect to minecraft! In the same way that mass relays allow players in Mass Effect to explore the galaxy, the mass relays in this mod will allow you to explore the entire width of a maximum minecraft map (up to 30,000,000 from the origin!). These mass relays are generated with the server admin runs the generaterelays command from the console. The plugin will pick a random point somewhere on the map (the x and z coordinates could be in the millions!), build a primary relay there, and then populate the 100,000x100,000 area around the primary relay with secondary relays.
What's that? You don't know what primary relays and secondary relays are? Well settle down kiddies, because I'm about to tell you. Secondary relays come in clusters of 100 on the map and all secondary relays in the same cluster will share the same integer address. A relay's address will look like A.X, where the X could be any number from 00 to 99, and the A is the cluster number. All secondary relays in the same cluster will be relatively close to each other, all of them inhabiting the same 100,000x100,000 area on the map. As such, secondary relays only have a range of 150,000 meters and thus can only teleport you to other relays within that range. For example, if you are at relay 3.23, you could teleport to any other relay with 3 as the number before the decimal, such as 3.64 or 3.83 or 3.00 .

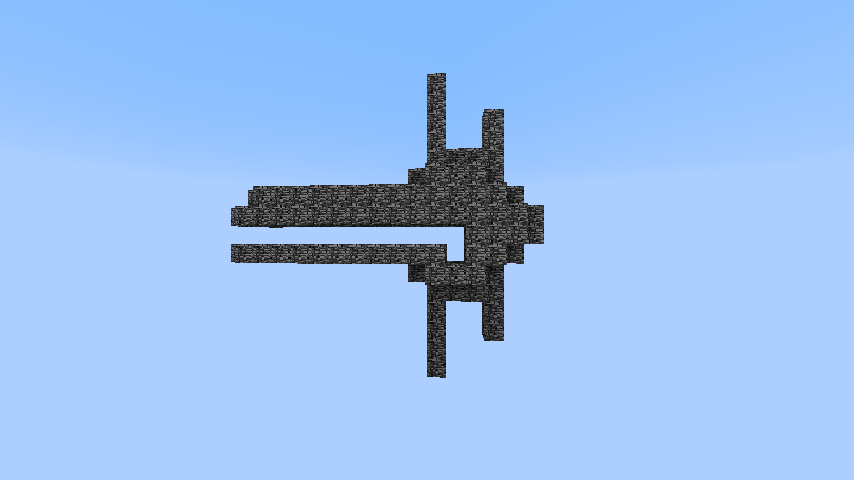
That's all good and well for traveling within a single cluster, but what if you want to get out and explore the rest of the map? Then you will need to get to another cluster, and the only way to do that is to use a primary relay. The clusters could be millions of blocks apart, which is a big problem for secondary relays as they only have a range of 150,000 blocks. However, primary relays can teleport players to any other primary relay, as well as players being able to teleport to and from any other secondary relays in the same cluster as a primary relay. Essentially, a primary relay acts just like a secondary relay, except that you can teleport to any other primary relay with it. You can tell a primary relay apart by it's distinctive design, and also by the fact that it will have a whole number address, such as 1.0 or 0.0 . For example, from the relay 2.0 a player could teleport to 3.0 or 1.0, however from the relay 0.0 a player could only teleport to 1.0 .

How does one use the relays though? Well it's simple. All you have to do is make your way up to the relay (they are at the maximum height level of the map, so they are pretty far up) and stand in the middle of the two block high space in the center of the relay. Once you are standing there, type the command /relay x.xx where x.xx will be the address of the relay you want to travel to. You can also just type /relay to receive the address of the relay you are inside.

Relays are magnificent pieces of alien technology powered by an extremely valuable substance called element zero (you minecraftians know it as diamond block). In the below photo, you can see the element zero core of a mass relay while it has it's maintenance hatch open (it is usually closed). In the event that the element zero core inside the mass relay is destroyed, the next time someone tries to use the /relay command inside it, a maintenance hatch will open, exposing the place where the core should be. Players cannot travel to or from this relay until the element zero core is replaced, and once it is replaced and a player uses the /relay command, the maintenance hatch will close and players can travel from this relay once again. Only a strategic placement of a massive amount of tnt can damage the element zero core, or an op in creative mode.

You can also use blocks of element zero and iron to construct your own prototype relays. A pair of these relays, like The Conduit in Mass Effect, make up their own mass relay network separate from the main relay network. You can construct a prototype relay by placing an element zero core (diamond block) on the ground and building a tower 4 high of iron blocks to the sides of it. You then put a sign on the diamond block that specifies certain attributes about this relay pair. On the first line of the sign, you put either the letter "a" or "b", without the quotes. This represents which side is which in a relay pair, as you can only travel from relay "a" to relay "b", not from "b" to "a", just like you can only travel from The Conduit to the relay monument but you cannot in the reverse order. The second, third, and fourth lines are the coordinates of this prototype relay's twin. To easily find the coordinates of a diamond block simply place a sign on top of a diamond block and right click the diamond block. The sign will then write the three coordinates of this diamond block on itself. Keep in mind however that it is the coordinates of this relay's twin that you must put on it's sign. After both prototype relays in a pair are built and the correct information about each other are entered onto their signs, they are ready to use. To use it, you simply stand on the diamond block of relay "a" and type /relay . This will teleport you to relay "b", but keep in mind that there is no way to travel from relay "b" to relay "a" unless you build another relay pair close by.
This picture shows a prototype relay without the information sign on the diamond block. Don't forget to fill out the sign correctly!

Your Ship, The Normandy
But how would one travel to a relay to fix a broken element zero core when they can be thousands or millions of meters apart? Well along with mass relays using the substance, you can also use smaller pieces of element zero to power your own FTL drives in your very own spaceship! Simply hold any number of element zero pellets (diamonds or diamond blocks) in your hand (holding them in your hand means that you are in your ship!) and you will be in fly mode (you can fly by double jumping and you don't take any fall damage). If you right click, you will automatically move forward at a speed that is dependent on how many diamonds (or diamond blocks multiplied by 9) you are holding. If you right click again, you will stop moving forward automatically, but you will still be in fly mode. Flying forward constantly consumes about 1 redstone dust per second, but hovering in fly mode consumes no redstone dust. However, if you switch to any other item in your hand besides diamonds, you will stop moving forward automatically and you will leave fly mode (leaving you vulnerable to massive fall damage when you hit the ground). If you have 10 or more diamonds in your hand, your movement speed may be too much for many servers, so the ftl drives in these cases have been tweaked. Since you move forward at about 20 m/s per diamond, when you right click with 10 or more diamonds in your hand you will be teleported a certain distance forward in the direction you are looking (the distance is determined by the number of diamonds you are holding multiplied by 20) and you will lose one redstone dust. This emulates one second of travel while taking it easy on the server you play on. You cannot teleport up or down using this method, which means that you want to have flown up high before you attempt to travel with 10 or more diamonds, as you are likely to phase into a block or mountain if you are at low altitude. This makes travel to relays long and arduous, but possible!
Remember your favorite resource-gathering mini-game in Mass Effect 2? That's right, probing has been added to minecraft! Since you need to own a spaceship to probe/scan planets, you need to have at least one diamond in your inventory to scan/probe. Before you can scan and probe, you need to create probes. The picture below this paragraph shows the recipe for creating a set of 5 probes. If you need to remember, just think of the probe having an iron drill bit, lapiz circuitry, and a redstone propulsion system. Once you have probes to scan with, just right click with the probe in your hand at any block within sight. The probe will then give you a list of ores in a 5X5 column from that block down to bedrock. The numbers of ores in the column are displayed next to the first letter of their names (G for gold, D for diamond, R for redstone, etc.). If you like what you see, left click with the redstone torch in your hand and you will probe the area. This consumes one probe and will give you about as much ore as was listed in the scan. The inacuracy from scan to probe haul is because, due to inefficient mining methods, ores explode as they are mined, thus destroying some small percentage of the yield.

The Normandy also comes equipped with shields which have varying effect based on how large your element zero core is. If you are holding diamonds in your hand and you get attacked by a player or mob, your kinetic barriers make it so you will receive no damage and one redstone dust will be used up. If you are holding diamond blocks in your hand and you get attacked by a player or mob, your cyclonic barriers make it so that player or mob will be injured the same amount that you would have been, at the cost of one redstone dust. Also, if you are holding a diamond block and a projectile is shot at you, such as an arrow, your shield will redirect the projectile to whichever direction you are facing, so if you are facing the attacker you will fire the projectile back at them.
If you have a large element zero core (are holding a diamond block in your hand) and you left click, you will fire the Thanix Cannon. The Thanix Cannon uses up one iron block and one redstone dust each time it fires, and the strength of it's beam is determined by how many diamond blocks you are holding. The Thanix Cannon works by causing a single TNT sized explosion at the location you are looking, and then repeats this process for however many diamond blocks you are holding. With a sufficient number of diamond blocks, the cannon can burrow a hole through a mountain, down to bedrock, or through an enemy base.
Commands
/generaterelays world number : This command can only be run from the console. World is replaced with the name of the world you want to populate with relays and number is replaced with the number of clusters you want to populate it with. There are 100 relays in a cluster. Cluster number 0 (the first cluster you ever generate) will always be centered on coordinates (0,0) and primary relay 0.00 will be at (0,0). You can run this command multiple times, each time it is run it will continue adding clusters from the number of clusters it ended on last time (this is so admins can add more clusters if they want later on, without having to start over from scratch). If you choose not to include a number, it will default to 500, which will take about 13 hours to generate.
/relay x.xx and /relay and /relay x.xx 1 : This command can be executed from the center of the inside of a mass relay by players. It is enabled for all players by default. The x.xx is the relay address they want to travel to. If you fail to include an address, it will tell you the address of the relay you are currently standing in. If you add anything after the x.xx and you are an op, it will teleport you to that relay even if you are not standing in a relay currently.
/nearbyrelays x : This command is disabled for players by default. If you replace the x with a number, it will search for relays within that radius from your current position and display them to you.
Permissions
MassRelay.relay : This is the permission for using the /relay command, and is set to true by default.
MassRelay.nearbyrelays : This is the permission for using the /nearbyrelays command, and is set to false by default.
MassRelay.ftl : True by default. Set this to false to keep the ftl feature from interfering with other flight plugins you are running. Player will still be able to fly around with the diamonds, but switching to a non-diamond item will not deny them flight permission.
MassRelay.probe : True by default. This allows players to use the probe function. Set to false to disallow probes.
plugins/MassRelay/config.yml options and defaults
randomRelayHeight: false If set to true, relays will be generated at random heights. This overrides the relayHeight number if set to true.
relayHeight: 245 This sets the height relays will be generated at. Don't go above 245 or below 6, or the top or bottom of the relay will be cut off.
relaysPerCluster: 100 How many secondary relays you want in a cluster.
secondaryRelayRange: 150000 The distance that secondary relays can transport you. If set lower than this, cluster-wide access is not guaranteed.
worlds: worldList When the config.yml file is generated, it will create a list of all present worlds with the word true after their name. To disable this plugin for a world, change the word true to false after the world name. Disabling the plugin for a world will allow creative flight to behave correctly once again and prevent non-creative players from flying with FTL drives.
Servers That Run This Plugin
- CrystalCraft : crystalcraft.sytes.net:25805
- Buttercraft : 184.164.136.210:25590
Comments


-

_ForgeUser7013278 Owner
-
View User Profile
-
Send Message
Posted Sep 12, 2014Dude you should really update this plugin to 1.8/1.7.10. This plugin is amazing and I love it. Keep up the good work!
-
View User Profile
-
Send Message
Posted Nov 9, 2012This still maintained?
-
View User Profile
-
Send Message
Posted Jun 7, 2012i think you should make this compatible with Movecraft's Aircraft's and stuff that would make this amazing idk how you do it also i put this on my server just now my ip is 67.222.156.57:25565
-
View User Profile
-
Send Message
Posted May 21, 2012I really love the idea of the plugin, but dislike the need for players to type in commands. I feel like it ruins the feel of the game. Would you be open to the idea of players entering relay coordinates using a sign vs typing /relay x.xx?
For example, the player places a sign in a certain spot in the relay and enters the relay.subrelay address on the sign. Once the teleport, the sign the placed is them destroyed.
-
View User Profile
-
Send Message
Posted Apr 28, 2012Where are you supposed to place the sign for the prototype relays?
I've built 2 prototypes, a & b. They have the counterparts coordinates all setup as they should, and the sign is attached to the front of the diamond block. I stand in the middle, type /relay, and it tells me I'm not standing on one.
The mass relays all work perfectly fine, I'm only have problems with the prototypes.
I also feel you should make the prototype relays a bit more flexible. And easier to use. Instead of coordinates possibly a naming system, same for the a & b tags. Such as:
This would allow setting up relays easier, as well as the possibility of admins changing the destination without having to first travel to the new location and write down coordinates. Just setting up my first broken prototype was a chore. Going back and forth trying to assemble, get coordinates, and find out why it wasn't working. This would also allow players/admins to make custom prototype relays of their own design, while still maintaining functionality.
Take a look at: http://forums.bukkit.org/threads/tp-mxringplatform-v1-2-2-travel-in-a-stylish-way-1000.19396/
The way that teleport system works I think would be perfect for the prototypes in your plugin. Or at least something similar. I'm not a fan of using signs and ruining a structure/design.
-
View User Profile
-
Send Message
Posted Apr 20, 2012I didn't realize that it populates the map with relays without actually creating the area, nice.
So when I put false for a world on the config, and put permissions "relay:true and ftl:false" :
- Right clicking a diamond with a sign on it does not put the coords on the sign, but the prototype relays otherwise work
If I put true for a world on the config, with said permissions :
- Right clicking a diamond with a sign does put the coords on the sign, but the x is off by one, and the p.relays work when the x is fixed
Interestingly you can fly straight up without redstone, not just hover without consuming them.
-
View User Profile
-
Send Message
Posted Apr 20, 2012@raom
Yes, setting to false will keep players from flying or using any other functions of the "Normandy" ship.
-
View User Profile
-
Send Message
Posted Apr 20, 2012So if I add false to every world in the config, will that disable the whole plugin including relays or only the personal flying bit ? Ofcourse getting to relays at the top of the world can be a bit tricky without flying.
I'm just looking for some fast travel plugins that suits our server. Flying would add possibly more lag on server due players reaching areas not previously created.
-
View User Profile
-
Send Message
Posted Apr 17, 2012@cakenggt
You should try adding a moving craft system
-
View User Profile
-
Send Message
Posted Apr 16, 2012@Goldkoron
Nope, the ship is litterally just you whenever you are holding a diamond or diamond block. You just fly in whatever direction you are facing.
-
View User Profile
-
Send Message
Posted Apr 16, 2012The ship system works similar to that of like Movecraft or Boatmod? If so, I am going to making a video showcase on this plugin.
-
View User Profile
-
Send Message
Posted Apr 13, 2012You lost me two lines in.
-
View User Profile
-
Send Message
Posted Apr 10, 2012@cakenggt
Actually.. if I remember correctly, also due to the Oculus hiding among the debris field? And that was only in cluster 2... nvm, ill see if i can get its coords.
-
View User Profile
-
Send Message
Posted Apr 10, 2012v0.37
Probes are now a special item with it's own crafting recipe, not redstone torches. See description for the recipe.
-
View User Profile
-
Send Message
Posted Apr 9, 2012v0.33
There is now a fuel cost to flying in the form of 1 redstone dust/second of flight. This does not apply to hovering, only to speedy flight.
Probing added! Leave the monotony of mining behind! See description for details!
-
View User Profile
-
Send Message
Posted Apr 9, 2012@ruifung
Hmm, can you get the coords for that relay? The relay might be too close to the world limit (around 30 million in X or Z). If this is the case, you can think of this relay as being like the omega 4 relay from mass effect, you can't really operate around it because of a black hole nearby (if I have my lore right).
-
View User Profile
-
Send Message
Posted Apr 8, 2012@ludo0777
Yeah... and it goes on for over 10 minutes with several End of steam disconnects in between.
-
View User Profile
-
Send Message
Posted Apr 8, 2012v0.33
Bugfix where secondary relays X.01 through X.09 were not being generated. Now fixed.
-
View User Profile
-
Send Message
Posted Apr 8, 2012@ruifung
Pretty obvious really, the world is loading/generating.
-
View User Profile
-
Send Message
Posted Apr 8, 2012I wonder why when I teleport to a distant relay (unvisited) my client lags badly...